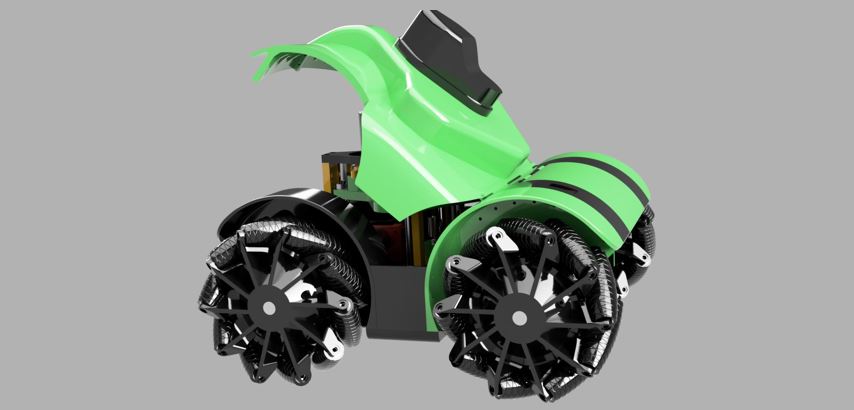
Aerator Chassis Build
Chassis Build
The chassis build is mostly completed using M3 bolts. If you have already built the ReP_AL Lawn mower then the assembly process should be very familiar.
Floor Plate
The 4 floor plate sections are bolted together using the floor plates. Bolt the plates together from the bottom of the plate using M3 bolts washers and nylon lock nuts.

Tip: As the battery will be positioned over the 6 bolts between the Frame Rear RH & LH ensure these bolts are flush with the floor plate.
Prepare Rain Sensor
Before installing the rain sensor, ensure that the 5V, GND and COM wires are soldered to the lower pads of the sensor. The top pins may need to be cut off to insert the sensor into the cover.

Control Door Assembly
The two rear covers and the control cover door should be sanded on the hinge point to ensure a smooth joint. Bring all three parts together and fix the control door using a thin wire. This can be inserted through the hole provided in the side of the right hand cover. Use a power drill to spin the thin wire and ease the insertion of the wire. Once the wire is inserted secure the covers together using M3 bolts.

TFT Screen
Before assembly solder the 5V, GND, TX and RX leads to the TFT MEGA. Ensure the TX ad RX leads are clearly labelled. Remember TX TFT goes to RX Aerator MEGA and RX TFT goes to TX Aerator MEGA. So label the wire so you know which one goes where later.
The TFT touch screen shield is inserted into the MEGA and then secured to the TFT plate using M3 flat headed bolts.

The TFT screen is the attached to the rear cover using M3 bolts. The bolts through the USB plugs also hold the TFT cradle.
The ON/OFF switch can be installed now. Ensure that 20cm of wire is soldered to the ON/OFF switch pins before insertion into the slot.

Rear / Front Wheel Arch.
The assembly of the wheel arches is the same for both front and back. Press the bearing into the wheel arch (use heat if necessary). Secure the bearing with the bearing clamp using M3 bolts, washers and nylon locking nuts.

Wheel Motor
Secure the wheel motor to the motor bracket using M3x15mm bolts. The diagonal corner of the motor bracket should face towards the center of the robot.

Fix the motor and motor bracket assembly to the wheel arch using M3x50mm bolts, washers and nylon locking nuts.

This assembly process should now be repeated for the other rear wheel arch and the 2 front wheel arches.
Rear Wheel Motor Driver Assembly
2 Motor Drivers are secured to the motor driver bracket using M3 x 10mm bolts.
Ensure all the wiring for the motors is now soldered to the motor drivers. See the wiring installation. This motor driver assembly can now be secured to the RH Rear Wheel Arch using the holes provided.

Front Wheel Motor Driver Assembly
The Front motor driver assembly is the same as the rear. Wire up the drivers before attaching them to the plate. The plate is then secured to the front right wheel arch as shown using and M3 bolt through the wheel arch. Ensure the bolt head is on the wheel side.

Drill Motor Driver Assembly
The drill motor driver assembly is completed as shown below. It is advisable to make any wire connections to the 43Amp driver before installation. Once completed this is secured to the front left wheel arch.

Lift Mechanism Motor Driver
The Motor Driver for the lift motor is attached to the Rear Wheel Arch LH. The lift motor is a single bridged motor driver with a 40mm fan for cooling air. USe the test program to ensure that the lift motor is moving in the correct direction (UP/DOWN). If the motor is reversed the wires to the lift motor can be swapped (as shown in the electrical install instructions)


Chassis Assembly Step 1
To ensure access to the relevant grubber screws on the wheel axles it is advisable to assembly the chassis as shown below.
1st the side walls are attached to the rear wheel arches with M3 bolts through the wheel arch. Then the rear MECANUM wheels are attached pushing the axles through the wheel bearings and onto the wheel motors. These are fixed using M6 grubber screws and locktite.

Once the rear assembly with MECANUM wheels is ready, this is bolted onto the floor plate as shown below.

Chassis Assembly Step 2
The front wheel arches and facia can now be assembled on to the assembly:

Front Mecanum Wheel Assembly
The front Mecanum Wheels can now be assembled as access to the grubber screws is easy at the front of the robot.

Sonar Modules
the sonar modules can now be pressed into the front facia. Use heat if necessary to soften the plastic somewhat and allow a tight fit.
Compass Location
The compass is located in the side pocket on the Chassis floor. Holes are provided in the floor panel to locate the compass holder.

Battery Assembly
The battery is best installed before the drill lift mechanism. The custom battery holder should be used and inserted into the chassis as shown. Two location holes are provided in the chassis floor to secure the battery.
The battery will need to be in a slightly tipped position to fit in the tight space

Drill Mechanism Assembly
The drill mechanism is now be secured to the robot chassis using 6x M5x40mm bolts, washers and locking nuts.

Lower End Switch
The lower end switch is secured to the bracket and located into the chassis using the holes provided with M3 bolts and nylon locking nuts.


PCB Board Installation
The PCB is attached to the PCB Frame. This then is secured to the vertical post of the lift mechanism.

Main Covers
Use the following overhang settings in CURA to get the correct amount of support structure for the main covers.
75 overhand and 30% infill density (touching build plate)
The covers can be positioned on the build plate as shown.

The two cover halves are secured together using M3 bolts and nylon locking nuts.

The motor cover is secured from the underside using M3 bolts.

The main cover is then assembled using thin wire which is pushed though the hole provided on the RH Rear Cover. Again ensure the hinge points are well sanded and a power drill is used to spin the wire, which will help insertion.