PIXHAWK Arduino Connection
PIXHAWK Arduino Connection
The PIXHAWK wiring to the Arduino Mower MEGA is very simple and can be completed with just a few cables.
The PIXHAWK integration only works with the Robot Control software version V9.731 and higher.

A softwrae serial is created on the Arduino MEGA using pins A10 and A11. These are used to communicate with the PIXHAWK on the TELEM 2 using the Mavlink library. You may need to splice a special cable for the TELEM 2 using the cables provided with the PIXHAWK.
The PIXHAWK throttle right and throttle left PWM signals are then connected to the MEGA D11 and D12 pins. The mega then uses a PWM read command to detect the PWM signals comming from the PIXHAWK and transfers these to the wheel motors.
PIXHAWK Setup
The PIXHAWK setup is well documented on the ARDUPILOT website.

A standard PIXHAWK setup includes:
- PIXHAWK Module
- GPS Compass
- Power Module (Converts main battery voltage to 5V),
- 3DR Radio (allows communication between a laptop running mission planner and the PIXHAWK)
- Buzzer (to hear commands being activated)
Mission Planner Software
The mission planner software is a very powerful tool to plan GPS missions.
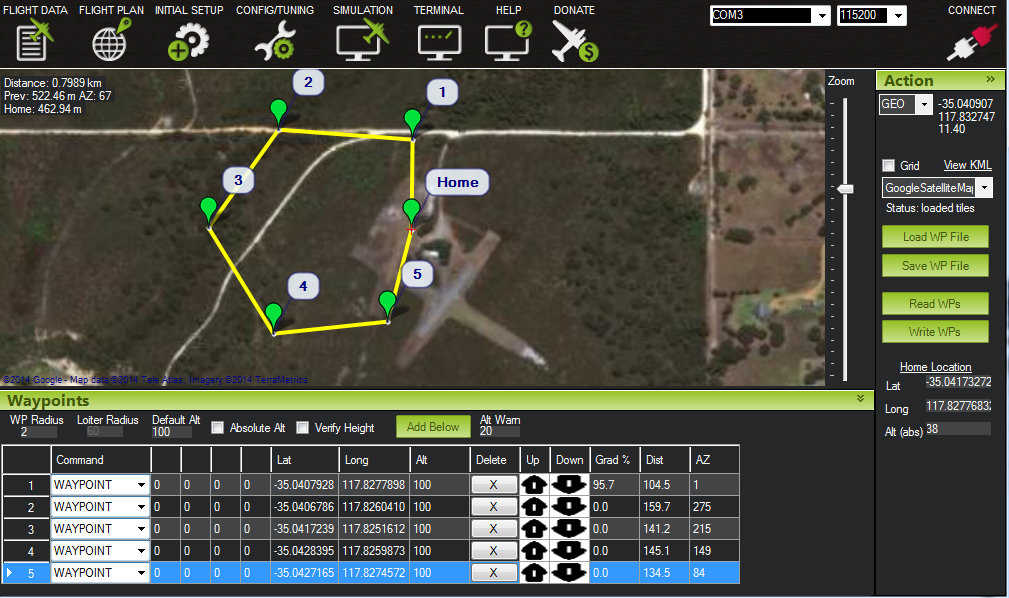
This is a free software which can be downloaded from the Ardupilot website and runs on your laptop or mobile phone. Using the 3DR radio the mission planner software can communicate with the PIXHAWK module when the robot is running allowing missions to be started or changed in real time.